Easter Cards
-
Stampin’ Up! Easter Lilies Easter Card Plus a Bonus Card
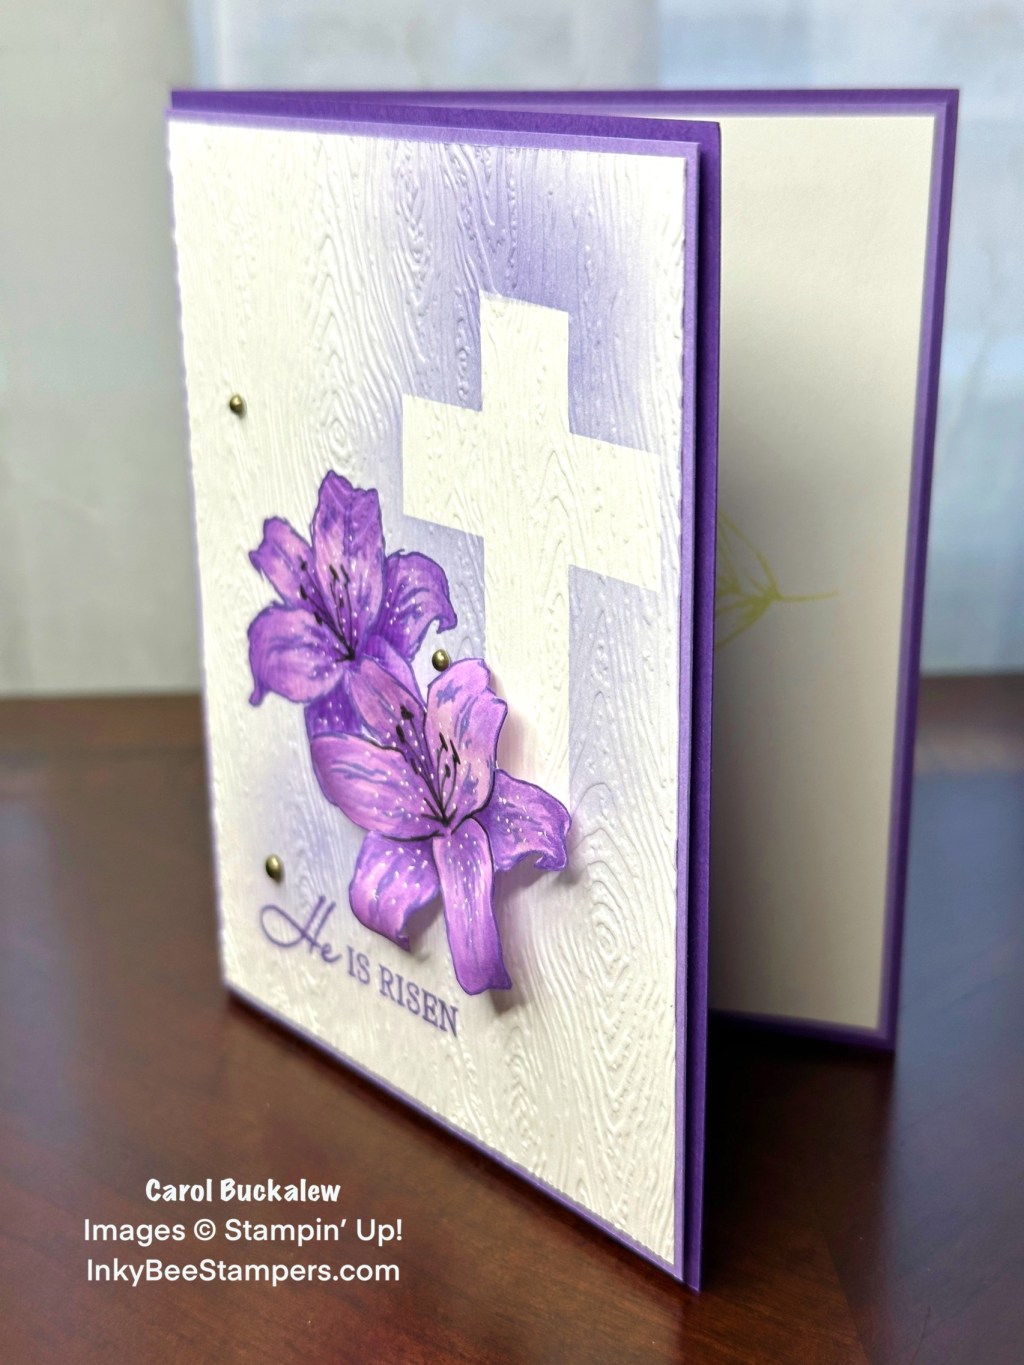
Happy Friday! I created this card using the Easter Lilies Stamp Set, Timber 3D Embossing Folder, as well as some masking, blending and fussy cutting! I originally created another card using both the Easter Lilies Stamp Set and the Easter Lilies Dies and then realized that the Easter Lilies Dies are currently unavailable. I hate… Continue reading
-
Stampin’ Up! Darling Details Easter Card

It’s not necessary to use a dedicated Easter themed stamp set and dies to create a pretty Easter card. I used the Darling Details Bundle to create today’s card and borrowed the Easter sentiment from the Excellent Eggs Stamp Set! I’m very partial to the beautiful eyelet frame from the Darling Details Dies and thought… Continue reading
-
Stampin’ Up! Excellent Eggs Book Fold Easter Card for the Happy Inkin’ Thursday Blog Hop

It is Thursday and time for another Happy Inkin’ Thursday Blog Hop! If you are hopping over from Terry Lynn’s blog or you are arriving here first…welcome! I know we are going to see lots of inspiration today so be sure to hop around and check out all of the blogs! Let’s get started! I… Continue reading
-
Stampin’ Up! Excellent Eggs Easter Card for the Happy Inkin’ Thursday Blog Hop
It is Thursday once again and time for another Happy Inkin’ Thursday Blog Hop! If you are joining the hop from my page or you hopped over from Terry Lynn’s blog…welcome…I’m happy you are here! I have included links below so you can hop around and see all of the great inspiration today! I created… Continue reading
-
Stampin’ Up! Easter Lilies Card
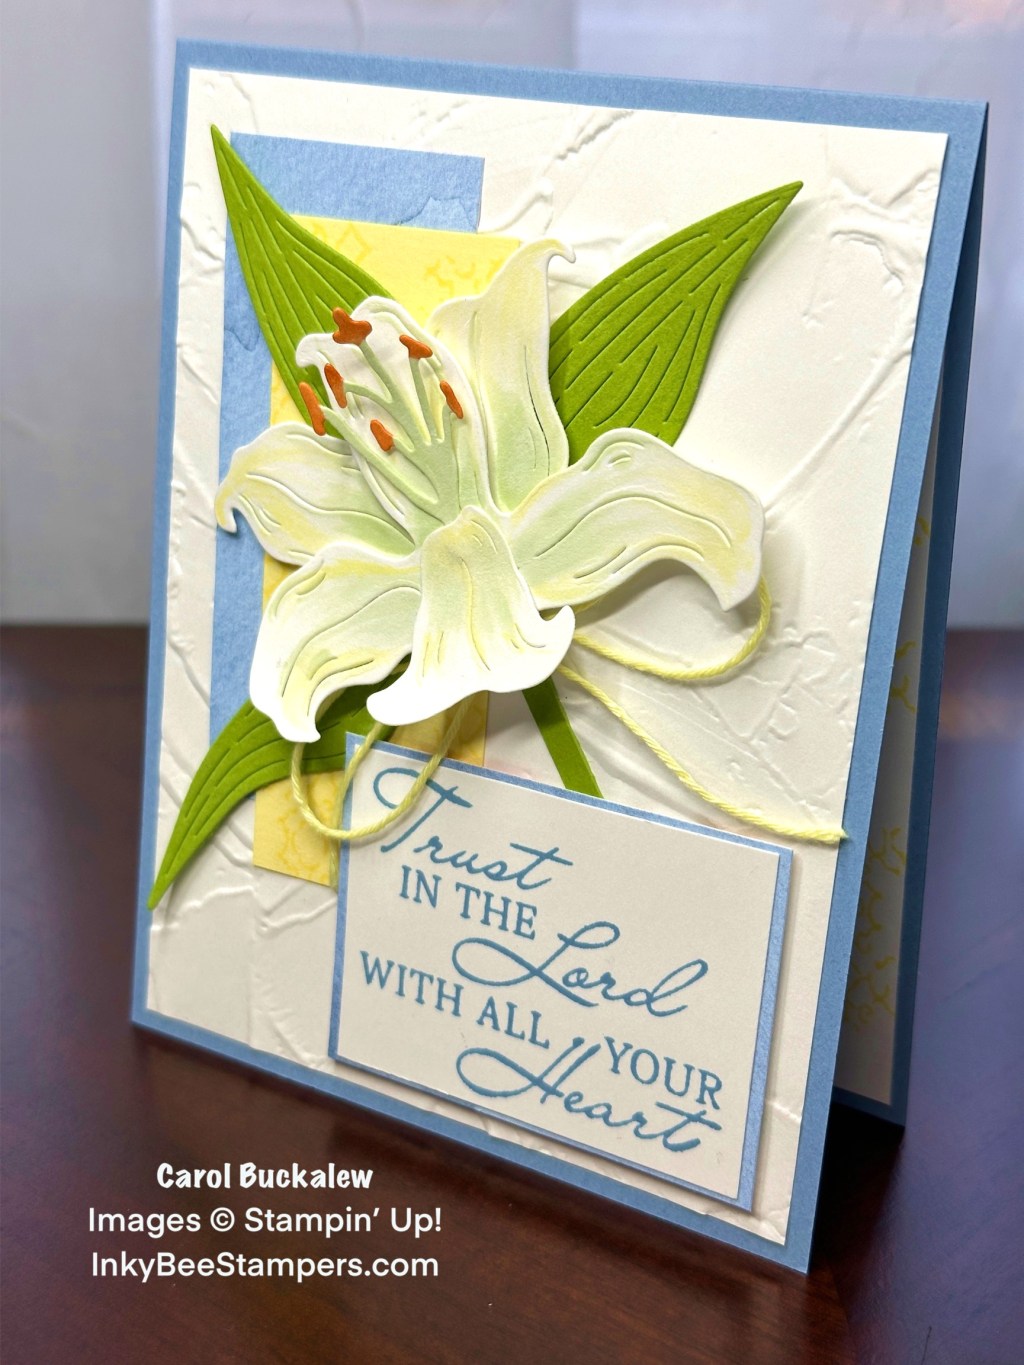
I used the beautiful Easter Lilies Bundle to create today’s card along with a Boho Blue solid print from the Flight & Airy 12″ x 12″ Designer Series Paper pack. Texture was provided by the Painted Texture 3D Embossing Folder. A white cardstock panel was embossed using the Painted Texture 3D Embossing Folder and then… Continue reading
-
Stampin’ Up! February Paper Pumpkin Kit – Sweet Springtime
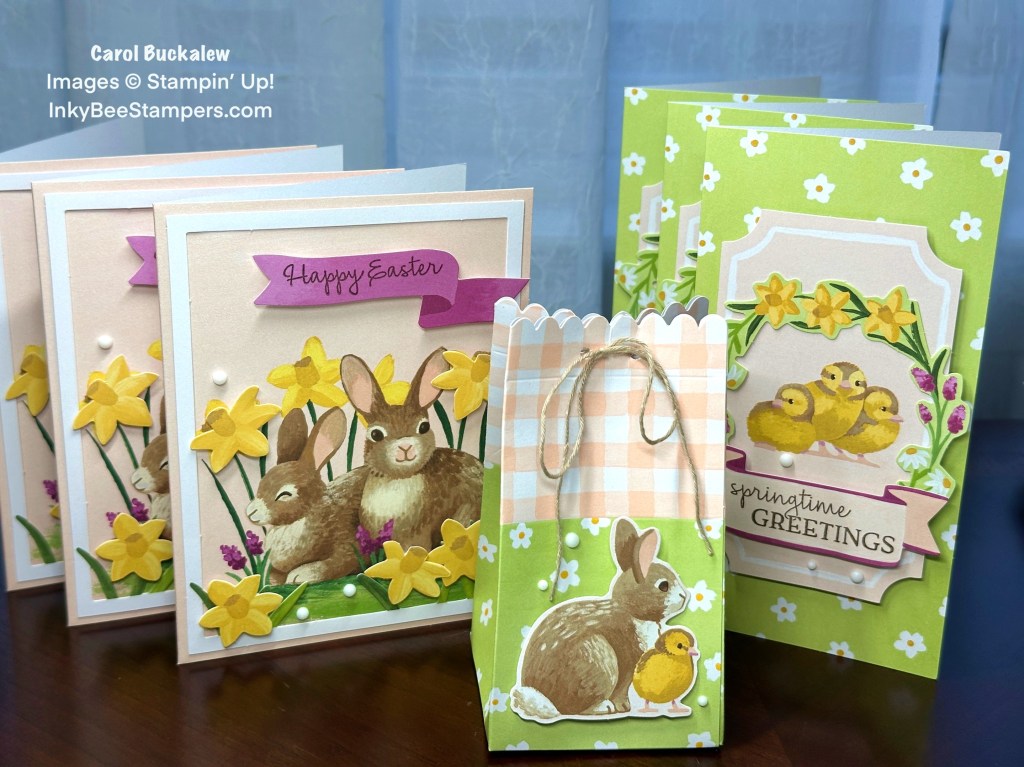
My February Paper Pumpkin Kit arrived and I couldn’t wait to put it together! The February kit creates Easter or Spring cards and contains these adorable images of bunnies and chicks…perfect for Spring! The Sweet Springtime Kit contained everything I needed to make a total of six cards – 3 each of two different designs,… Continue reading
-
Stampin’ Up! Excellent Eggs Hello Spring Card
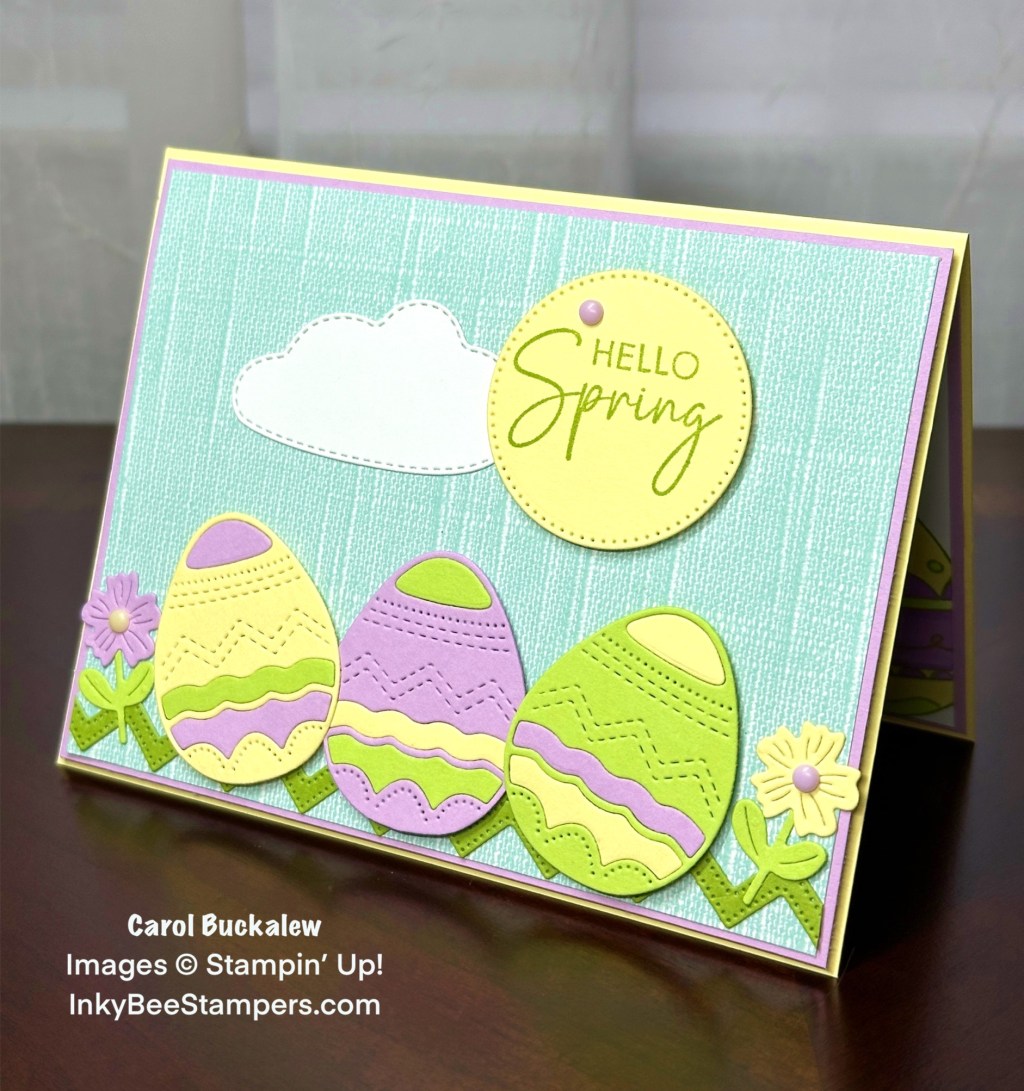
This cheerful Hello Spring card was created using the Excellent Eggs Bundle, Bright Skies Dies and the Softly Stippled 12″ x 12″ Designer Series Paper. The Excellent Eggs Bundle is a fun set for creating Easter cards…but also this Spring card! I chose a pretty Pool Party print for my card front from the Softly Stippled… Continue reading
-
Friday Fun Day! Woven Easter Basket & Chick
Happy Friday! I wanted to try something different and here it is! I started with a rectangle of scrap cardstock for the basket base and cut 1/2″ strips from various cardstock scraps and wove a little Easter basket. While this project was a little fussy to put together…it was a whole lot of FUN, too!… Continue reading

Latest Posts
- Stampin’ Up! Market Goodness Thank You Card
- Stampin’ Up! In the Grove Birthday Card for the Happy Inkin’ Thursday Blog Hop
- Stampin’ Up! Round We Go Celebration Card
- Stampin’ Up! Gone Fishing Masculine Retirement Card for Amy’s Inkin’ Krew Team Blog Hop!
- Stampin’ Up! Spotlight on Nature Note Card
Categories
- #Fun Fold
- #Gift Card Holder
- #Kits Collection
- #Paper Pumpkin
- #Quick&EasyOptions
- #SimpleStamping
- Adventure
- All Occasion
- All Occasion Cards
- Anniversary
- Appreciation Cards
- Baby
- Best Wishes
- Birthday Cards
- Bonus Days
- Celebration
- Children's Cards
- Christmas Cards
- Clearance Rack
- Congratulations
- Easter Cards
- Encouragement Cards
- Fall Cards
- Father's Day
- Friendship
- Get Well Cards
- Gift Box
- Gift Tags
- Good Luck Cards
- Graduation Cards
- Gratitude
- Halloween
- Holiday Cards
- In Color Cards
- Just Because
- Just Because Cards
- Kits Collection
- Last Chance Products
- Love
- Masculine Cards
- Memories and More Cards
- Mother's Day Cards
- Motivational Cards
- Note Cards
- Online Exclusives
- Paper Projects
- Paper Pumpkin
- Paper Share
- Retirement Cards
- Spring Cards
- St. Patrick's Day Cards
- Sympathy
- Thank You Cards
- Thanksgiving Cards
- Thinking of You Cards
- Uncategorized
- Valentine's Day Cards
- Wedding
- Welcome
- Welcome Baby
- Winter
- Wish You Were Here
Archives
- May 2024
- April 2024
- March 2024
- February 2024
- January 2024
- December 2023
- November 2023
- October 2023
- September 2023
- August 2023
- July 2023
- June 2023
- May 2023
- April 2023
- March 2023
- February 2023
- January 2023
- December 2022
- November 2022
- October 2022
- September 2022
- August 2022
- July 2022
- June 2022
- May 2022
- April 2022
- March 2022
- February 2022
- January 2022
- December 2021
Disclaimer
The content in this blog is the sole responsibility of Carol Buckalew as an Independent Stampin’ Up! demonstrator and the use of and content of classes, services or products offered is not endorsed by Stampin’ Up! All Stampin’ Up! images are ©Stampin’ Up! 2023-2024.
