It’s Thursday and time once again for another Happy Inkin’ Thursday Blog Hop! Thank you for stopping by my blog and welcome! I’m looking forward to seeing everyone’s creations for the Hop today.

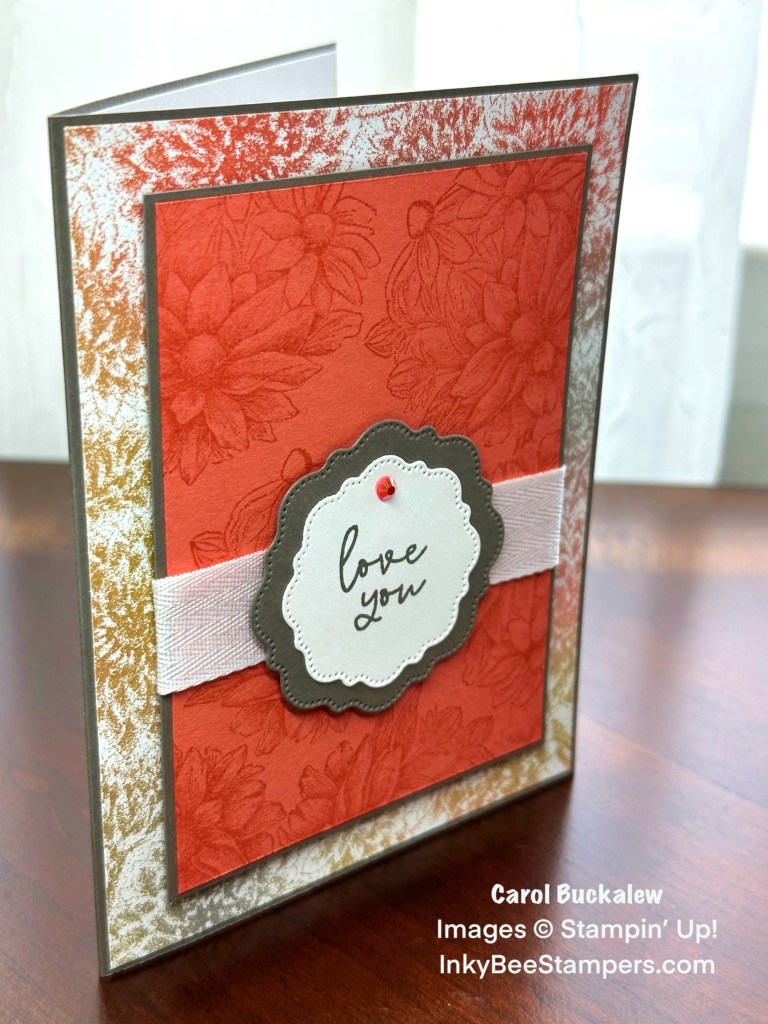
I created this pretty non-traditional Valentine’s Day card for today because…hey, pink, red and white aren’t for everyone! This card has a very clean design and one that is easy to duplicate. We have a Love Theme Challenge for the Hop and I’m pretty sure that a Valentine’s Day card fits the bill.

I used the Inspirational Sketches Stamp Set which pairs nicely with the Softly Stippled 12″ x 12″ Designer Series Paper. You can earn the Softly Stippled Designer Series Paper for free during Sale-A-Bration with a $50 order (it is beautiful paper!). I borrowed the sentiments from the Bee My Valentine Stamp Set and the sentiment label was created using the Thoughtful Expressions Dies.
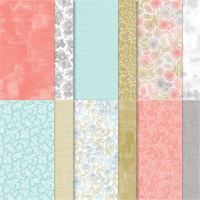
To start, I adhered a piece of the Softly Stippled Designer Series Paper to the front of a Pebbled Path card base. This floral print is in Calypso Coral, Pebbled Path, Wild Wheat and white. On a Calypso Coral cardstock panel measuring 4-1/2″ x 3-1/4″ I repeatedly stamped the floral image from the Inspirational Sketches Stamp Set in Calypso Coral ink until the panel was covered with the stamped image. I love the tone-on-tone look this creates!

The stamped panel was then adhered to a Pebbled Path mat. I wrapped a length of Herringbone Ribbon around the panel and secured the ends to the back using Stampin’ Seal. The panel was adhered to the card front using Stampin’ Dimensionals and was centered from top to bottom and left to right. Using the Thoughtful Expressions Dies, I die cut a white and Pebbled Path decorative cirle. The “Love you” sentiment was stamped onto the white circle in Pebbled Path ink. This was then adhered to the Pebbled Path decorative circle, then adhered to the card front using Stampin’ Dimensionals.
On the inside panel, I partially stamped the floral image again in Calypso Coral ink. The “Happy Valentine’s Day” sentiment was stamped at the top of the panel – also in Calypso Coral ink. The panel was then adhered to the inside of the card.
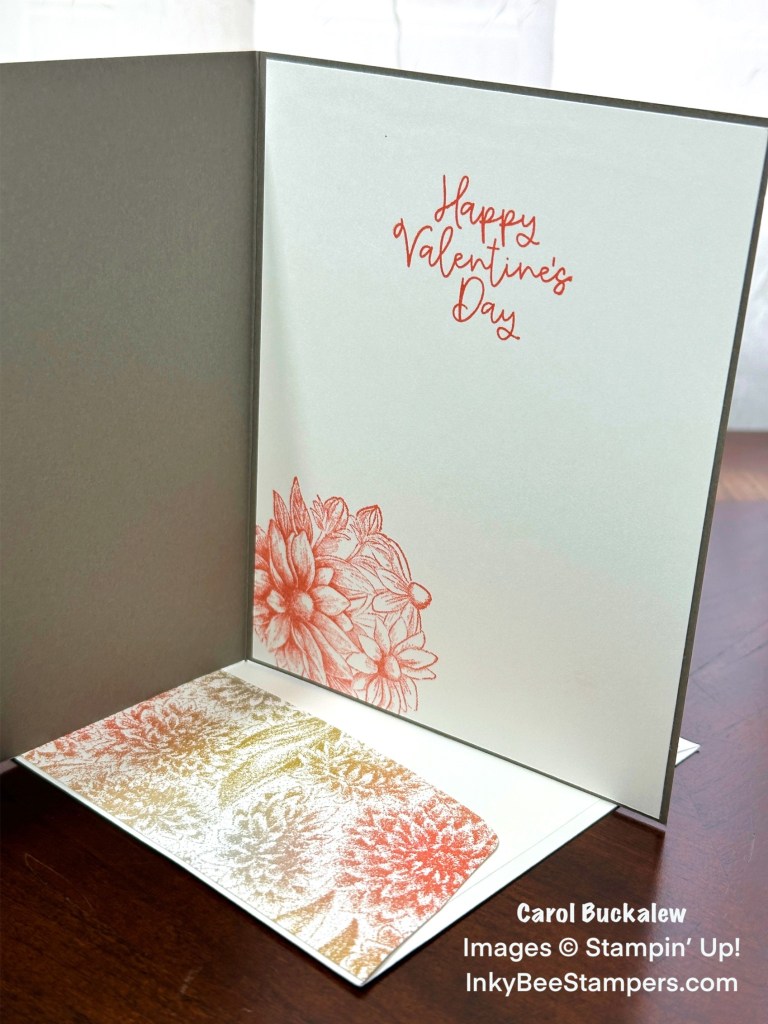
The same floral image was partially stamped onto the envelope front in Calypso Coral. A coordinating piece of designer series paper was adhered to the envelope flap with the excess paper trimmed away from the flap using a pair of paper snips. To complete the card, I added a single Iridescent Pastel Gem to the top of the sentiment label on the card front.

I want to thank you again for stopping by! If you enjoyed this card and would like to recreate it, you can download, save and print the pdf tutorial by clicking on the image below. Happy crafting!

Let’s get back to the Hop! If you are joining the Hop from my blog, be sure to use the navigation links below to see more creativity. You can click on the Next button to go to Nel’s blog or click on any name in the list below to go directly to that person’s blog. Enjoy!

- Amy Koenders
- Mary Deatherage
- Jaimie Babarczy
- Karen Finkle
- Akiko Sudano
- Karen Ksenzakovic
- Tara Carpenter
- Terry Lynn Bright
- Carol Buckalew (You are here!)
- Nel Thames
Ready to Join the Stampin’ Up! Family?

If you’re looking to join the Stampin’ Up! team as a demonstrator, join during Sale-A-Bration for some added benefits! During Sale-A-Bration (January 4 through February 29) you can join my team using one of the options below:
Option #1:
- Pay $99 USD for your Starter Kit
- Choose $125 worth of products of your choice in your Starter Kit
- PLUS receive the Stampin’ Glass Mat Studio for FREE (a $60 value) (Item #163987)
Option #2:
- Pay $99 USD for your Starter Kit
- Choose $125 worth of products of your choice in your Starter Kit
- PLUS receive an additional $30 worth of products of your choice in your Starter Kit
- That’s a total of $155 worth of products for just $99!
Of course, there are other great benefits to becoming a Stampin’ Up! Demonstrator, such as free shipping on your Starter Kit, a 20%+ discount on demonstrator orders, early access to new catalogs and promotion information, early ordering of new products, no pressure to sell products and my full support as a valued team member!
If you have questions about what it means to be a Stampin’ Up! Demonstrator, feel free to reach out to me…I would love to chat with you! And there is no better time to join than during Sale-A-Bration! You can contact me at inkybeestampers@gmail.com.
If you’ve already made up your mind and you’re ready to join, click here.
The January-April 2024 Mini Catalog and Sale-A-Bration are Here!
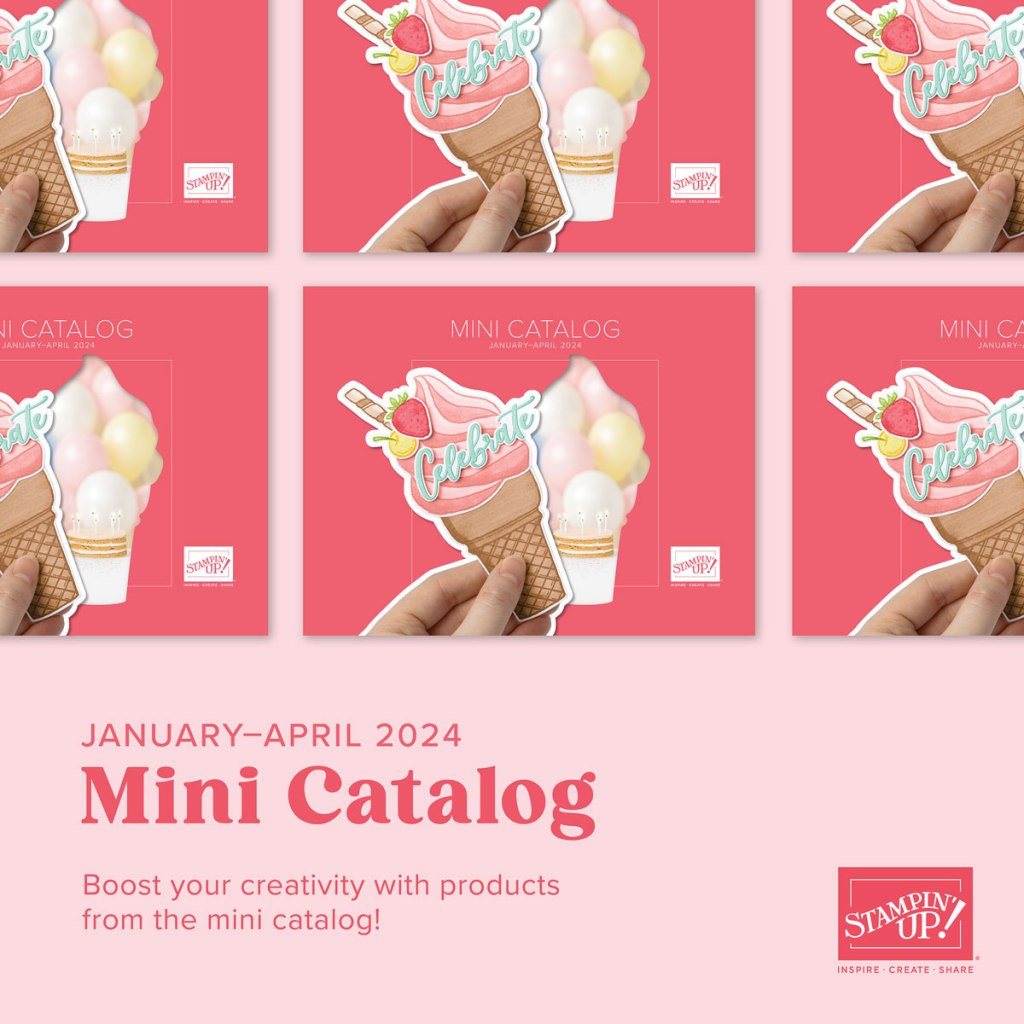
The January-April 2024 Mini Catalog is Live! You can view a digital copy of this catalog as well as the Sale-A-Bration brochure by visiting my “Shop My Stampin’ Up! Store” page by clicking here. There are lots of new goodies covering everything from Valentine’s Day, Easter, Spring and everything else in between!
Did I mention Sale-A-Bration? Sale-A-Bration runs from now through February 29! Sale-A-Bration is a special time of the year where you can earn free products with your purchases! Read on to learn how you can participate in Sale-A-Bration.
SHOP:

Choose a FREE Sale-A-Bration product from the January-February 2024 Sale-A-Bration brochure with every $50 or $100 you spend (before tax and shipping).
HOST:

Host a qualifying party and select an additional $30 in FREE products. When you host a party during Sale-A-Bration, you get to earn FREE products of your choice! With any order of at least $300 (party sales or personal sales) you get to choose an additional $30 worth of products from any current catalog or from the online store for free!
Click on the image below if you’re ready to shop!
January Host Code

Use my current Host Code and receive a free gift from me valued at $8 when you place an order of $35 or more (before shipping and tax). If you place an order greater than $150, do not use the Host Code as you will be eligible for Stampin’ Rewards (but you will still receive the free gift from me!). Use my January Host Code – KF7EDVKT.
Products used to create today’s project which are available now, are included below.


22 responses to “Stampin’ Up! Inspirational Sketches Non-Traditional Valentine’s Day Card for the Happy Inkin’ Thursday Blog Hop”
Such a pretty card Carol. Love the color on color stamping and the non-traditional Valentine colors
LikeLiked by 1 person
Thank you, Karen!
LikeLike
Wow! I must have that stamp set now! TFS
LikeLiked by 1 person
I love the flower image from this stamp set…gorgeous! Thanks for dropping me a comment!
LikeLike
Beautiful card – so cool to see NOT a bunch of hearts in red and pink! Love it! And really enjoyed watching you make it yesterday! 🙂
LikeLiked by 1 person
Thank you, Mary! I enjoy the traditional Valentine’s colors, too, but sometimes it is nice to change things up! 🙂
LikeLike
Love the design, colors and stamp set!
LikeLiked by 1 person
Thank you, Karen!
LikeLike
Just beautiful Carol! Love the colors and the layering! 🙂
LikeLiked by 1 person
Thank you, Amy!
LikeLike
Stunning card, Carol. I love the tone on tone background. Subtle and beautiful!!
LikeLiked by 1 person
Thank you, Nel! I love to do tone-on-tone stamping…one of my favorite techniques!
LikeLike
This is just gorgeous! Love all the pretty flowers! 😊
LikeLiked by 1 person
Thanks so much, Akiko! 🙂
LikeLiked by 1 person
You can send love in any color! WHile I do like red and white, maybe pink too, I am not a stickler for a color theme. I think the main reason I love this blog hop is because of the diversity of thought behind the cards, especially when it is a theme.
LikeLiked by 1 person
I couldn’t agree more, Julie! While I do like the traditional Valentine’s Day colors…a change from the norm is good once in a while. I like the hop challenges, too. It gets me out of my comfort zone…lol! Thank you for stopping by my blog!
LikeLike
[…] Carol Buckalew […]
LikeLike
Oh, I DO LIKE THIS! card!
LikeLiked by 1 person
Thank you, Terry Lynn!
LikeLike
How lovely that you designed the inside and an envelope element. So often there is only a cover design. Thank you.
LikeLiked by 1 person
Thank you! I like to show the full, finished project. Thank you for stopping by my blog and leaving me a comment…much appreciated! Have a great day!
LikeLike
How lovely that you included a design for the inside as well as the envelope. So many designs only include the front. Thank you
LikeLiked by 1 person