It’s time for another Happy Inkin’ Thursday Blog Hop! If you hopped over from Terry Lynn’s blog or you are starting off with my blog…welcome and thanks for stopping by! Be sure to use the links below to check out all of the inspiration on the Hop today!
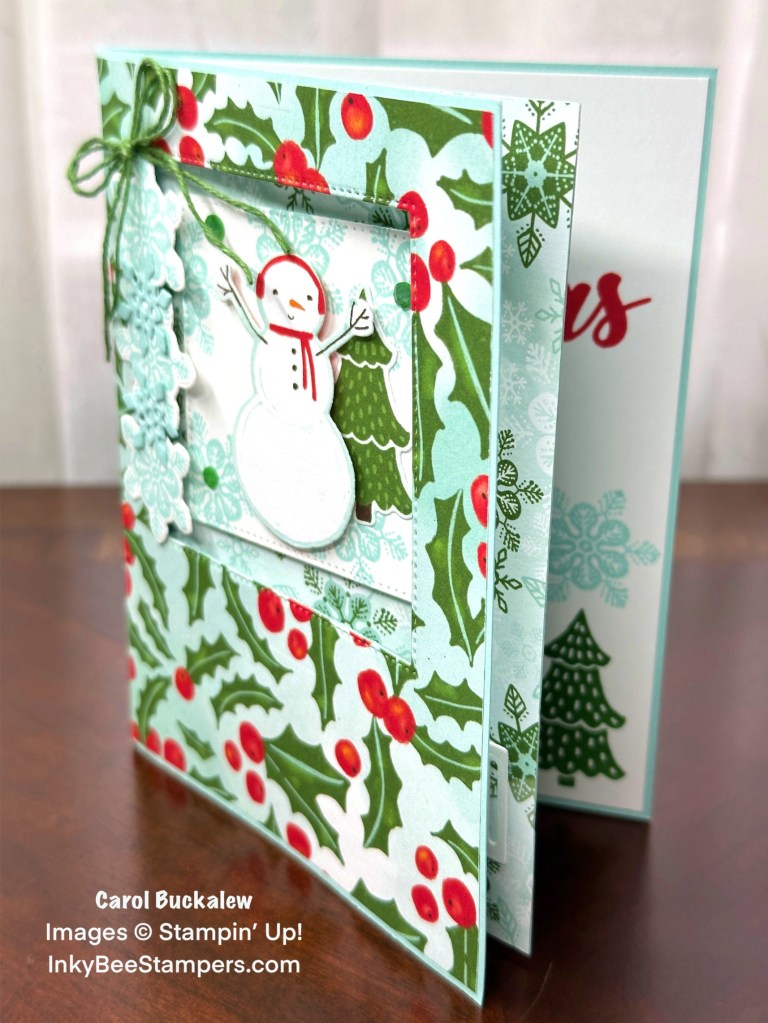
My card for today is a fun fold created using the cheerful Snowy Wonder Bundle and the Snowy Scenes 12″ x 12″ Designer Series Paper. The sentiments and sentiment label are from the Peaceful Season Bundle.
We have a sketch challenge for today’s Hop. How did I do?

I have already showcased the Snowy Wonder Bundle and Snowy Scenes Designer Series Paper multiple times, but I couldn’t help myself…I had to create at least one more card using this bundle and paper! I created this fun fold with a front window and a surprise middle panel!
I started out with a standard card base measuring 8-1/2″ x 5-1/2″ which is scored at 4-1/4″. I adhered a holly print panel measuring 5-3/8″ x 4-1/8″ from the Snowy Scenes Designer Series Paper to the card front. I used the largest square die from the Stylish Shapes Dies (if you don’t have these dies you need to get them) to cut out a window at the top of the card front – cutting through the card front and the adhered designer series paper panel at the same time.

The middle panel of this fun fold measures 5-3/8″ x 4-7/16″ and is scored at 1/4″. With the 1/4″ score line on the left, another designer series paper panel measuring 5-3/8″ x 4-1/8″ from the Snowy Scenes Designer Series Paper (this one in a snowflake print) was then adhered to the front of the middle panel. With the panel facing up, I adhered Tear & Tape to the 1/4″ section on the left, then folded at the 1/4″ score line. The panel was then adhered to the inside of the card base, with the folded edge of the middle panel sitting just to the right of the center scoreline on the card base.
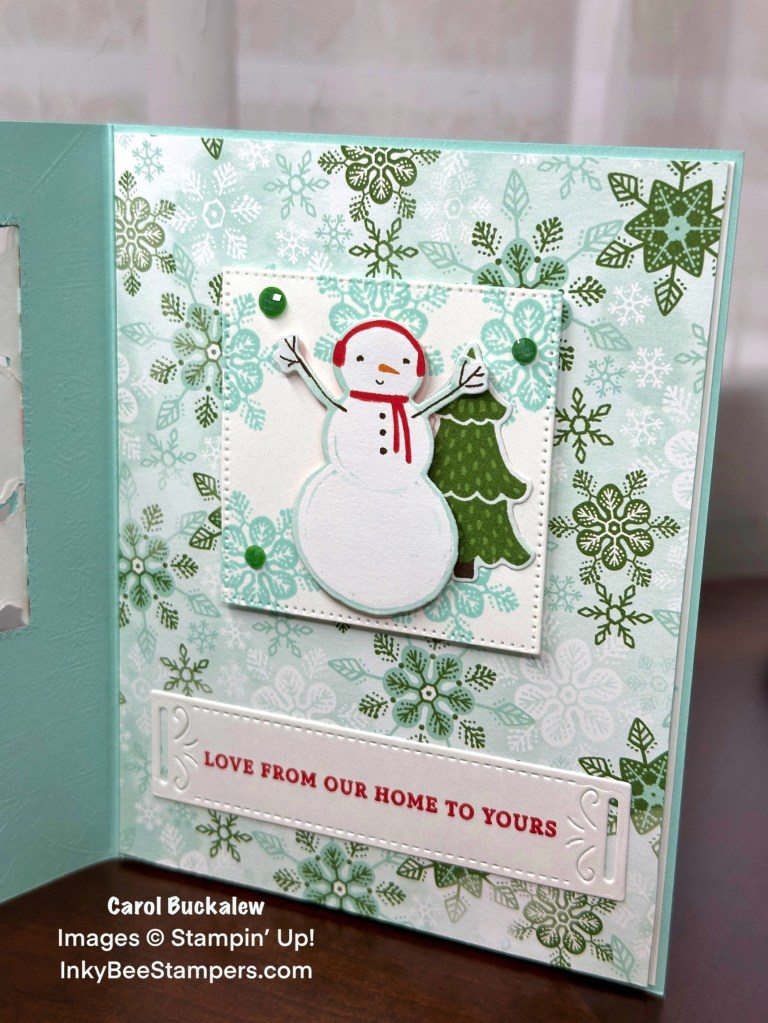
Using the Stylish Shapes Dies, I cut a square from white card stock using the second from largest square die. The large snowflake image from the Snowy Wonder Stamp Set was stamped across the square in Pool Party ink. I then used the Snowy Wonder Dies to cut out a snowman and tree from the Snowy Scenes Designer Series Paper. These were added to the stamped square. With the card base closed, I adhered the square in the window opening using Stampin’ Dimensionals. A sentiment from the Peaceful Season Stamp Set was stamped onto a piece of white cardstock and I used the long slender rectangular die from the Peaceful Season Dies to cut out the sentiment. The sentiment label was adhered just under the square on the middle panel.
On the inside panel, I stamped the “Merry” and “Christmas” sentiments from the Peaceful Season Stamp Set in Poppy Parade ink. The tree and snowflake images were stamped onto the lower corner of the panel in Garden Green and Pool party inks. The panel was then adhered to the inside of the card base, just behind the middle panel. The inside panel covers the hinge on the middle panel and was adhered to the inside of the card.

Using the Snowy Wonder Stamp Set, I stamped three large snowflakes onto white cardstock in Pool Party ink then I used the coordinating die from the Snowy Wonder Dies to cut out the snowflakes. I also die cut two small, detailed snowflakes from Pool Party cardstock. The snowflakes were adhered to the left edge of the window on the card front. A double Natural Tones Linen Thread bow in Garden Green was added towards the top left of the window on the card front and three Garden Green Earth Tones Shimmer Gems were added to the snowman square.

I repeated stamping of the tree and snowflakes on the envelope front and a coordinating piece of designer series paper was adhered to the envelope front.
I had so much fun creating this card! The Snowy Wonder Bundle is so cheerful and uplifting! I was determined to create a card using the pretty holly and berry print from the Snowy Scenes Designer Series Paper…mission accomplished! If you would like to recreate this fun fold you can download, save and print the pdf tutorial by clicking on the image below.
I hope you enjoyed my project for the Hop today and I want to thank you again for stopping by! Let’s get back to the Hop! You can click on the “Next” button to go to Amy’s blog and the top of the blog hop list, or click on any name in the list below to go directly to that person’s blog. Enjoy!

- Amy Koenders
- Mary Deatherage
- Karen Finkle
- Akiko Sudano
- Karen Ksenzakovic
- Tara Carpenter
- Terry Lynn Bright
- Carol Buckalew (You are here!)
Join the Stampin’ Up! Family!

Come be a part of the Stampin’ Up! family by joining my team! We have an amazing team and there is never any pressure to sell products! Just enjoy the 20% discount for yourself, attend exclusive Demonstrator events, and get early access to new products! Join today and you can start receiving 20% off of new products!
Feel free to reach out to me if you have any questions at inkybeestampers@gmail.com. I’m always happy to chat!
If you’re ready to join now, click here.
Two New Kits Added to the Kits Collection!
Two new kits have been added to the Kits Collection – the Nature’s Paintings Kit and the Layered Landscapes Kit!
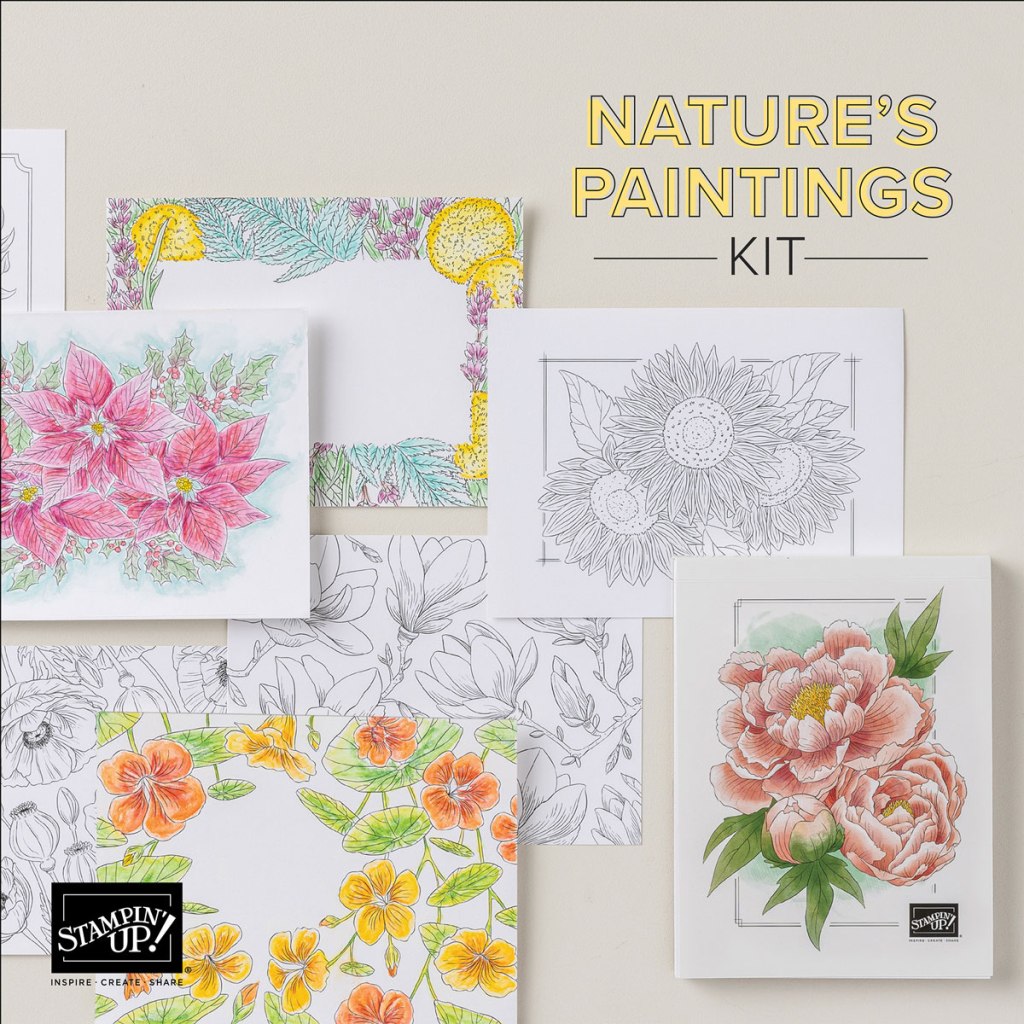
Nature’s Paintings Kit:
The new Nature’s Paintings Kit is something unique and different that allows you to embrace your creative side! This unique kit includes everything you need for a fun creative experience: a coloring book, watercolor pencils, and a water painter. All you need is some imagination and water! Create lovely, picturesque images using advanced coloring techniques with this craft kit. Or make something that’s never been seen before—like green flowers with purple leaves. Keep it realistic or color outside the lines—it’s up to you. And once you’re done, you can use your finished artwork to create a one-of-a-kind card front! Here are the kit details:
- Predesigned projects
- Line art illustrations
- Step-by-step instructions
- 24 watercolor paper pages, 2 each of 12 designs
- 8 Watercolor Pencils
- 1 Water Painter
- Coloring Book: 4-1/2″ x 6″ x 1/2″ (11.4 x 15.2 x 1.3 cm)
- Product colors: Berry Burst, Coastal Cabana, Daffodil Delight, Early Espresso, Flirty Flamingo, Garden Green, Pumpkin Pie, Red
You can view the unboxing video for the Nature’s Paintings Kit below…
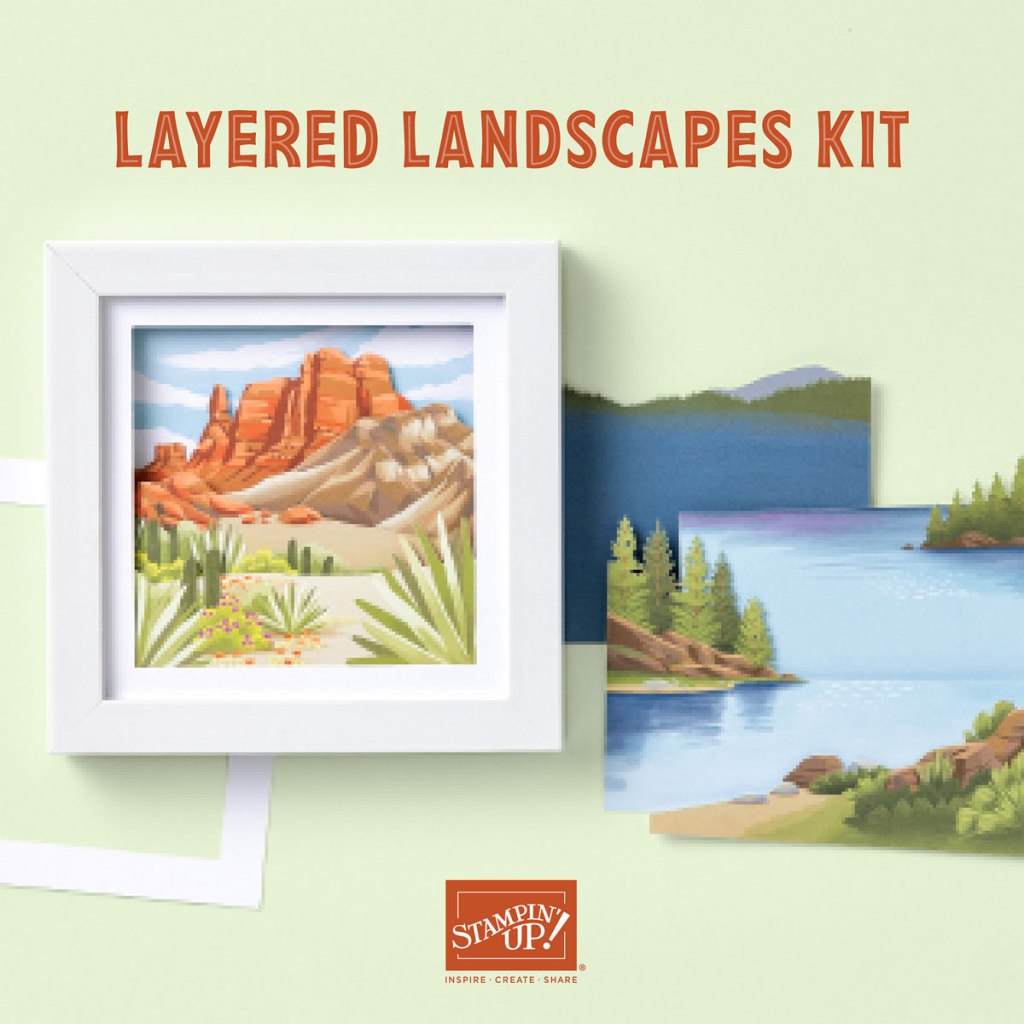
Layered Landscapes Kit:
Do you long for the great outdoors but don’t actually want to go outdoors? Then the Layered Landscapes Kit is perfect for you! DIY lovely home decor with this unique kit that includes four 7-1/8″ x 7-1/8″ x 3/4″ (18.1 x 18.1 x 1.9 cm) frames and precut paper pieces. You can either stand the frames up on their included easels or hang them on your wall. Either way, your houseguests are sure to love your new artwork! Here are the kit details:
- Predesigned projects
- Step-by-step instructions
- Precut pieces (No prep work! Get right to crafting)
- 4 white frames
- Frame size: 7-1/8″ x 7-1/8″ x 3/4″ (18.1 x 18.1 x 1.9 cm)
- Enough adhesive to complete projects
- Product colors: Balmy Blue, Basic Beige, Basic Gray, Berry Burst, Cajun Craze, Crumb Cake, Early Espresso, Gray Granite, Lemon Lime Twist, Misty Moonlight, Mossy Meadow, Night of Navy, Old Olive, Pecan Pie, Soft Sea Foam
You can view the unboxing video for the Layered Landscapes Kit below.
To view all of the kits available in the Kits Collection, click here.
November Paper Pumpkin Kit – Filled with Joy
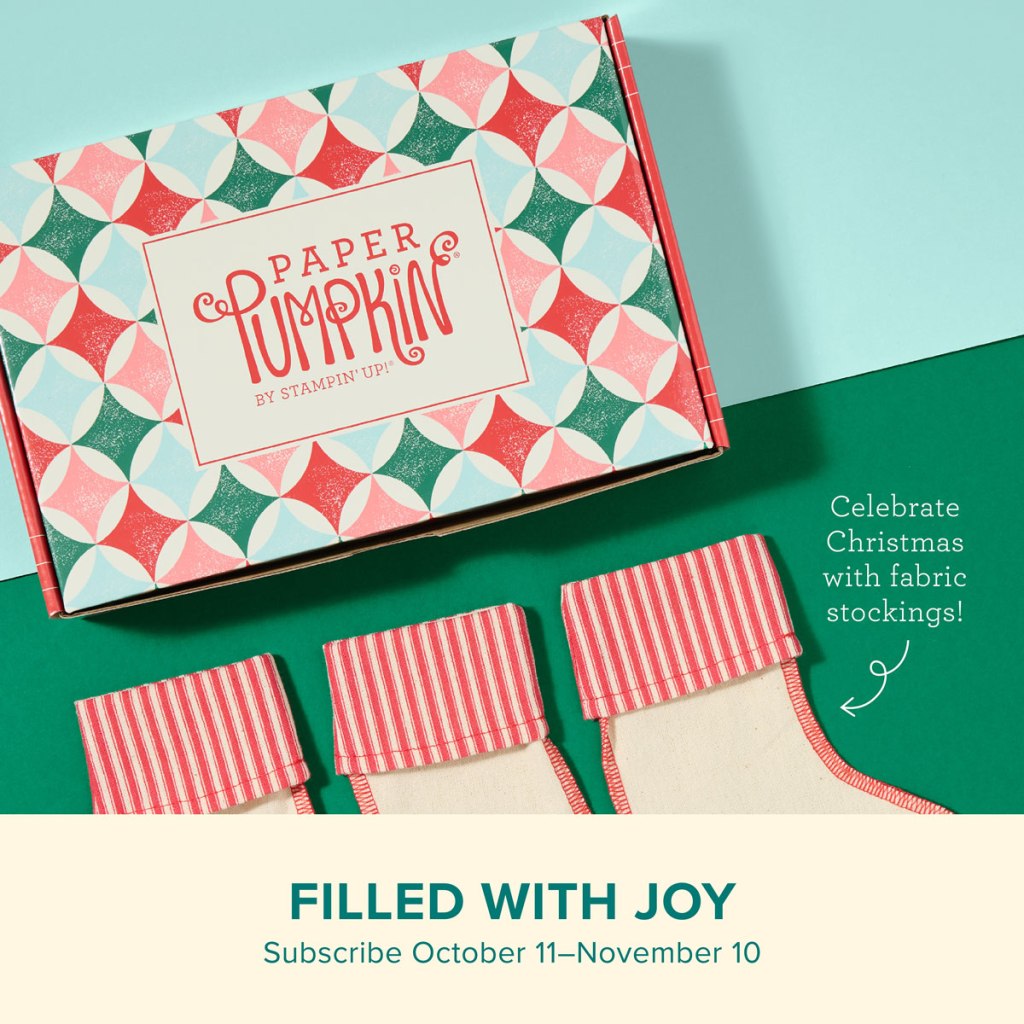
Subscribe between October 11–November 10 to Paper Pumpkin and receive the Filled With Joy Paper Pumpkin Kit! This kit celebrates Christmas with adorable stockings and gift tags! Here are the details:
- The kit makes 8 projects: 8 stockings with 8 gift tags
- Includes precut paper pieces
- Safety pins and specialty gold foil included
- Coordinating colors include Flirty Flamingo, Pool Party, Poppy Parade (Classic Stampin’ Spot), Shaded Spruce, and Very Vanilla
If you are not familiar with Paper Pumpkin Kits, everything you need to complete the project are included in the kit. This takes out all of the guess work so that you can start crafting right away. The kits are great to involve the kids with and they are perfect when you’re travelling…just toss the box in your bag and go!
Paper Pumpkin subscriptions are available on a month-to-month basis, or you can subscribe to a 3-month, 6-month, or 12-month subscription. You can also pause, start or stop your subscription at any time! Click here if you’re ready to subscribe to Paper Pumpkin now.
New Online Exclusives Available in the Online Store!

Check out the new selection of Online Exclusives in the online store now! There are some great suites, bundles and stand-alone stamp sets that you’re not going to want to miss!
If you are not familiar with Online Exclusives, these are products that are only offered in the Online Store. You will not find any of these products in a printed catalog. Some items will be restocked when they run out and others will be retired when they sell out so if you see something you want…be sure to grab it!
You can view the latest Online Exclusives flyer by clicking here.
Click here if you are ready to shop the Online Exclusives!
November Host Code

Use my current Host Code and receive a free gift from me valued at $8 when you place an order of $35 or more (before shipping and tax). If you place an order greater than $150, do not use the Host Code as you will be eligible for Stampin’ Rewards (but you will still receive the free gift from me!). Use my November Host Code –QMCK2NU9 .
Below is a list of products used to create today’s project.


11 responses to “Stampin’ Up! Snowy Wonder Fun Fold Christmas Card for the Happy Inkin’ Thursday Blog Hop”
OMG I love this card so much Carol. I missed your live, I’m going to watch the replay after work tonight.
LikeLiked by 1 person
Thanks so much, Karen! I had a lot of fun creating this one! 🙂
LikeLike
Definitely a wow card Carol!! Love the fun fold design and that paper is perfect for Christmas! 🙂
LikeLiked by 1 person
Thank you, Amy! I had lots of fun with this one!
LikeLike
So cute and fun!! I love the snowflakes and the fun fold!
LikeLiked by 1 person
Thanks very much, Akiko!
LikeLike
Oh my goodness – I love this card! Super cute – and such a cool fun fold, too! 🙂
LikeLiked by 1 person
Thank you, Mary! I had a lot of fun creating it! 🙂
LikeLike
Carol, what a great fun fold. You should enter it in our Creative Creases Challenge – Anything Goes with a Fun Fold. Mary, Debbie and I would love to see it there, as would the other design team members. Hugs, Karen
LikeLiked by 1 person
Thank you, Karen! I always forget about the challenges…really bad about that! Thanks for the timely reminder! 🙂
LikeLiked by 1 person
[…] Carol Buckalew […]
LikeLike