
It is already Thursday and time for another Happy Inkin’ Thursday Blog Hop! I can’t wait to see what my team members have created for the Hop today! I know there is sure to be lots of inspiration.
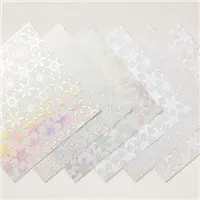
I created my card for today using the Christmas Lights Stamp Set, Twinkling Lights Dies and the Snowflake 12″ x 12″ Specialty Vellum. Sentiments came from the Brightest Glow Stamp Set.

We have a theme challenge for today and that is “Let it snow!”. I love a pretty snowfall…as long as I don’t have to drive in it!

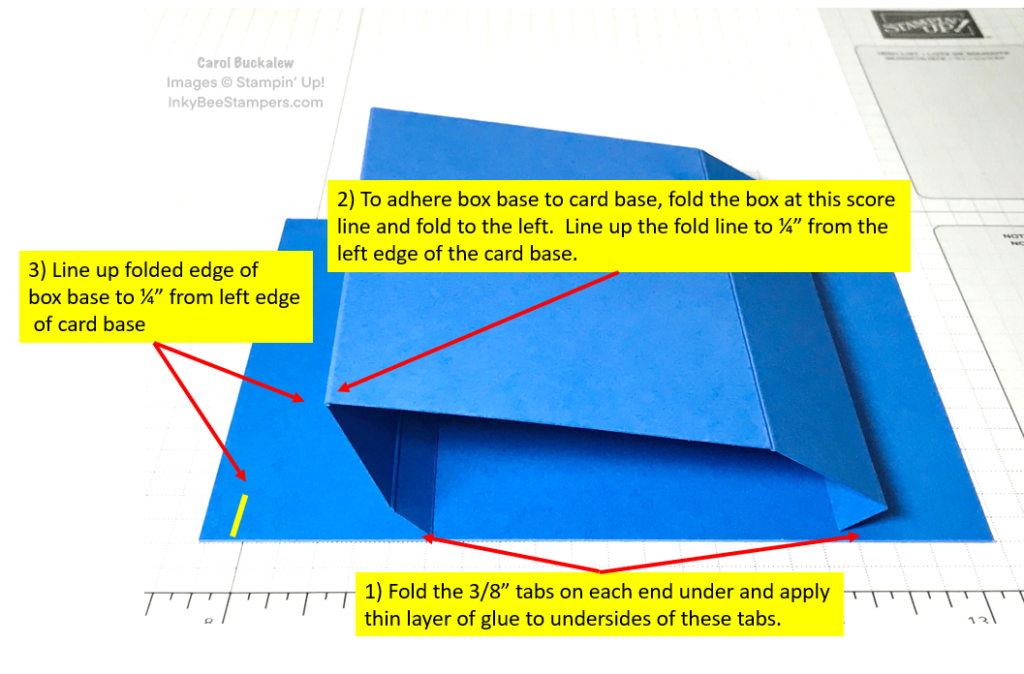
I’m calling this card a box fun fold. I was just playing around and came up with this fold, so the measurements are mine. The card consists of two bases – a card base and the box base which I cut from Orchid Oasis cardstock. The card base measures 5-1/2″ x 4-1/4″ and has no score lines. The box base measures 5-3/4″ x 4-1/4″ and is scored at 3/8″, 1-3/8″, 4-3/8″ and 5-3/8″. The first and last score lines create the “tabs” which get adhered to the card base.
Before adhering the box base to the card base, I first adhered Snowflake Specialty Vellum panels to the three sections on the box base. I folded the tabs on each end of the box base under and applied a thin line of glue to each tab. The box base is then folded at the 1-3/8″ score line and I lined up this folded edge 1/4″ from the left side of the card base, then flattened the box base and adhered it to the card base.
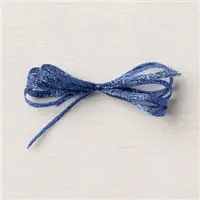
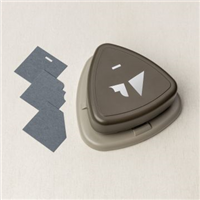
Once the two bases were adhered together, I added vellum panels to the right and left sides of the card base. I die cut a large snowflake in Basic White cardstock from the Twinkling Lights Dies set. The snowflake was adhered to the center panel of the card using Stampin’ Dimensionals. A sentiment from the Brightest Glow Stamp Set was stamped in Orchid Oasis ink onto a 3″ x 1″ piece of white cardstock. I then used the Very Best Trio punch to make the short ends of the sentiment label fancy. Each end of the sentiment label was trimmed to just above the curved section and the label was adhered to an Orchid Oasis mat, then adhered to the center panel using Stampin’ Dimensionals. A double bow was tied using Orchid Oasis Metallic Woven Ribbon and adhered to the center panel between the die cut snowflake and the sentiment label.

Since this card does not open like a traditional card, a panel was added to the back of the card. I stamped an additional sentiment from the Brightest Glow Stamp Set onto a Basic White cardstock panel measuring 5-3/8″ x 4-1/8″. The medium-sized snowflake from the Christmas Lights Stamp Set was stamped in Orchid Oasis ink around this sentiment and the panel was adhered to the back of the card.

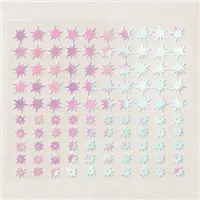
The same snowflake stamp was used to stamp snowflakes onto the envelope front and envelope flap. A large Adhesive-backed Star was adhered to the center of the large die cut snowflake and I adhered a combination of small and large stars to either side of the center panel to complete the card.
I hope you enjoyed my card for today’s hop and I want to thank you for stopping by! This is a great fun fold to show off pretty designer series paper, die cuts and specialty papers! The best part is that the card folds flat – either to the left or right – to fit into a standard A2 envelope!

You can view, download, save or print the tutorial for this card by clicking on the image below.

Let’s get back to hopping! You can click on the “next” button to go to the top of the Hop list and Amy Koenders blog, or you can click on any name below to visit that person’s blog. Enjoy!

- Amy Koenders
- Mary Deatherage
- Kristi Gray
- Jaimie Babarczy
- Karen Finkle
- Akiko Sudano
- Karen Ksenzakovic
- Tara Carpenter
- Carol Buckalew (You are here!)
Ready to Join Our Team?
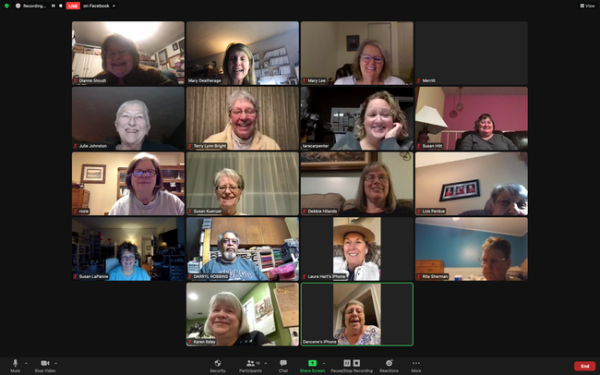
If you’re looking to join the Stampin’ Up! team as a demonstrator, come join my team! As a demonstrator you can earn 20%+ off products and there is no pressure to maintain demonstrator status if you decide it’s not for you. We have many hobby demonstrators who strictly maintain their demonstrator status just for the discount, and other demonstrators who wish to grow a business. Either way, we have loads of FUN! Look at all of the smiling faces!
There is not a better time to join my team than now! By joining my team you’ll be a part of an amazing and fun community and you can count on my full support as a member of my team! Did I mention that we have a lot of fun? It’s true!
I’m available to answer any questions you might have so feel free to reach out to me via email at http://www.inkybeestampers@gmail.com. I would love to chat with you!
If you’ve already made up your mind and you’re ready to join, click on the image below.

Use my December Host Code and Receive a Gift from Me!

Did you know that you can purchase supplies from me to make your own beautiful creations? And if you use my current Host Code, you will receive a free gift from me valued at $8 when you place an order of $25 or more (before shipping and tax). Use the December Host Code – FG366WSD. Click here to visit my Customer Rewards Page for the current Host Code.
I offer other Customer Rewards programs, too! To learn more about Inky Bee Stamper’s customer rewards programs, visit my Customer Rewards page here.


15 responses to “Stampin’ Up Christmas Lights Box Fun Fold Holiday Card for the Happy Inkin’ Thursday Blog Hop”
Carol, your use of the Snowflake Vellum is genius!
LikeLike
LOL…I’m not sure about the genius part, but the snowflake vellum seemed to fit the theme challenge. Thank you, Karen! 🙂
LikeLike
Cute fun fold! TFS
LikeLike
Thanks very much, Tara! 🙂
LikeLike
So pretty, Carol. I love that big snowflake set up on the box. TFS
LikeLike
Thank you, Susan! I think the large snowflake is my favorite!
LikeLike
So pretty! What a great fun fold design, love all of the snowflakes! 🙂
LikeLike
Thank you, Amy! 🙂
LikeLike
Hi Carol….this is a wonderful card!! I love the fun fold….the glitter of snow…..everything about it…….loved watching you create it ‘live’ too!!
LikeLike
Thank you so much, Faith! 🙂
LikeLike
Absolutely stunning Carol 🙂
LikeLike
Thank you, Karen! 🙂
LikeLike
So pretty – and I love the fold! Going to have to give it a try – thank you for the video and excellent directions! 🙂
LikeLike
Thank you, Mary! 🙂
LikeLike
[…] Carol Buckalew […]
LikeLike