
I was recently inspired by my team member, Joan, to create a card using the Iris Paper Folding technique. I have seen this technique before but had never tried it. Joan’s card was so beautiful that I had to give it a go. I watched a few tutorials on You Tube and I was off! Christine’s Crafts You Tube channel offers some easy-to-understand instructions in case you’d like to try this technique. You can find her video on creating a template by clicking here. For her instructions on how to complete a project, click here. I also provide instructions in my pdf tutorial linked below.
The great thing about the Iris Paper Folding technique is that you can create a pattern (or template) from any shape outline! I created my own template based on the largest square from the Stylish Shapes Dies for this card. I centered the square die onto a piece of white cardstock measuring 5-3/8″ x 4-1/8. The die was centered from left to right and the top edge of the die was placed approximately 3/4″ from the top of the panel. The die cut panel was placed onto a piece of copy paper with the wrong side of the panel facing up (the square center die cut was set aside for a future project). I then traced the square opening onto the copy paper and set about establishing the lines on the template. I’m including the basic instructions below on creating a template.
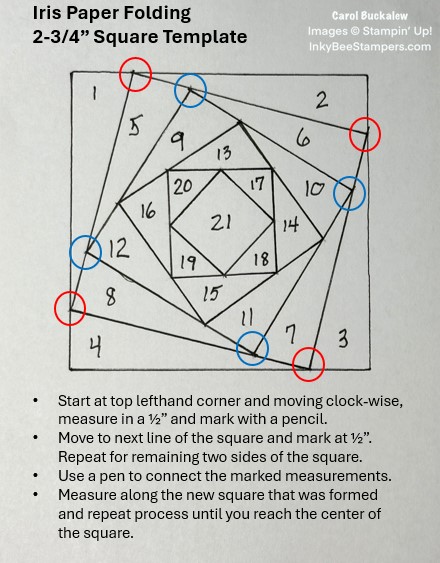
I selected four different papers from the Winter Meadow 12″ x 12″ Designer Series Paper pack. Each of these were cut to 1-1/8″ x 12″. The strips were scored along the long edge at 3/4″. The strips were folded and gently burnished with a bone folder (be careful scoring and burnishing designer series paper as it is not as thick as card stock). The folded strips must be slightly wider than the sections on your template.
The die cut panel was placed face down over the pattern I had created, and I used Post It Tape to hold the panel in place. To form the pattern, I started with section #1 and placed the folded strip, pattern side down, over the section with the folded edge placed on the interior line. The strip was cut to size with a pair of paper snips, then I used Scotch Tape to hold the strip down. I worked my way around the pattern, alternating the paper pattern each time. You will find complete instructions on the linked pdf tutorial below.
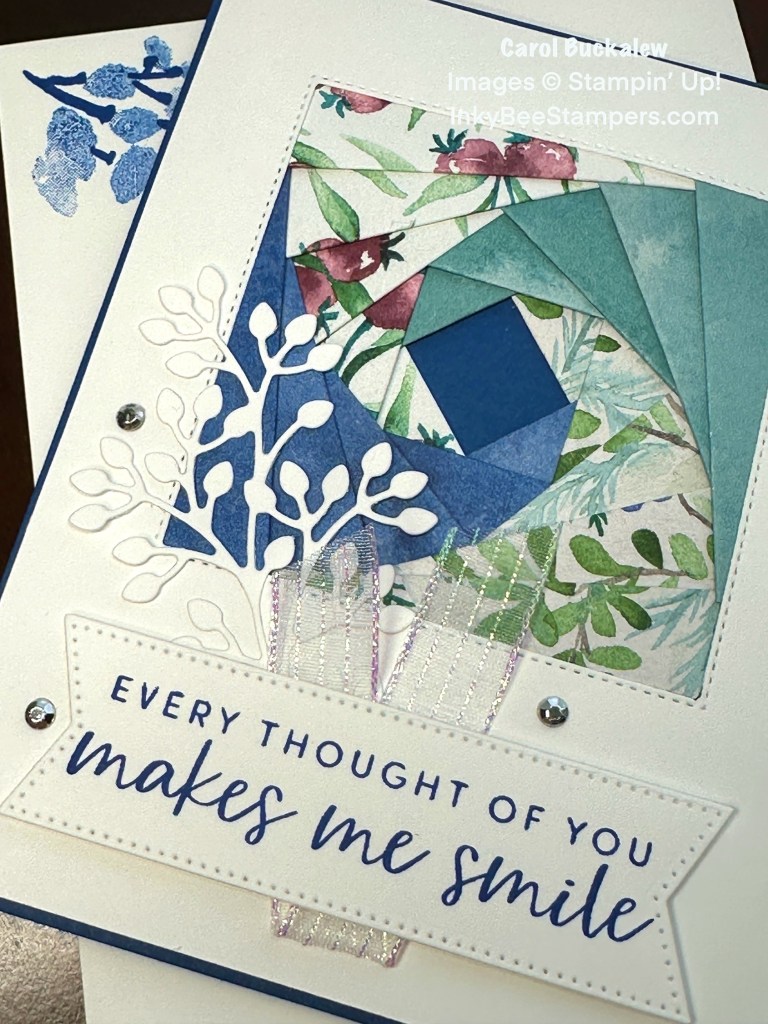
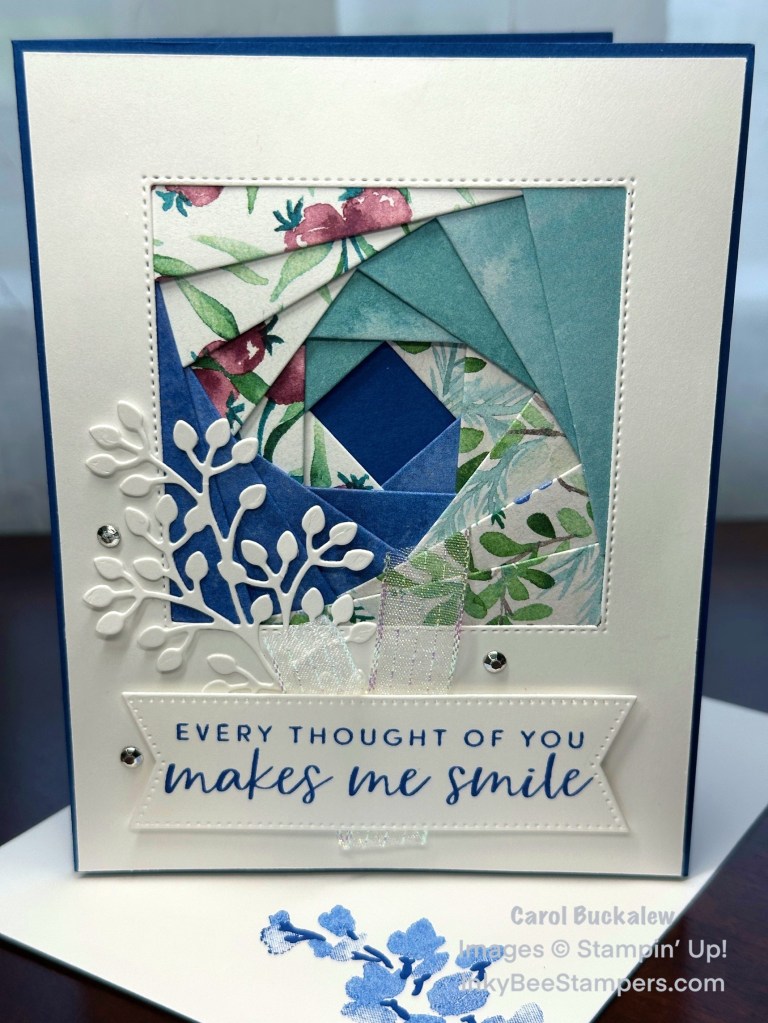
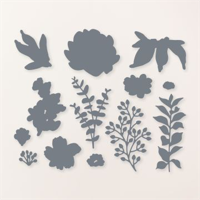
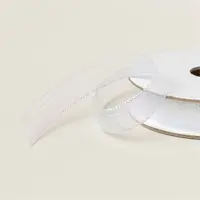
Once the Iris Paper Folding pattern was complete, I adhered the panel to the front of a Blueberry Bushel card base. I used a double stack of Stampin’ Dimensionals to adhere the panel as the paper folding can create quite a bit of bulk. A white die cut leaf sprig from the Textured Floral Dies was adhered to the lower left of the square. A sentiment from the Textured Floral Stamp Set was stamped onto a scrap piece of white cardstock and I used the largest banner die from the Stylish Shapes Dies to cut out the sentiment. A length of Iridescent Striped Trim was added under the square on the card front and the sentiment label was adhered over the trim using Stampin’ Dimensionals.
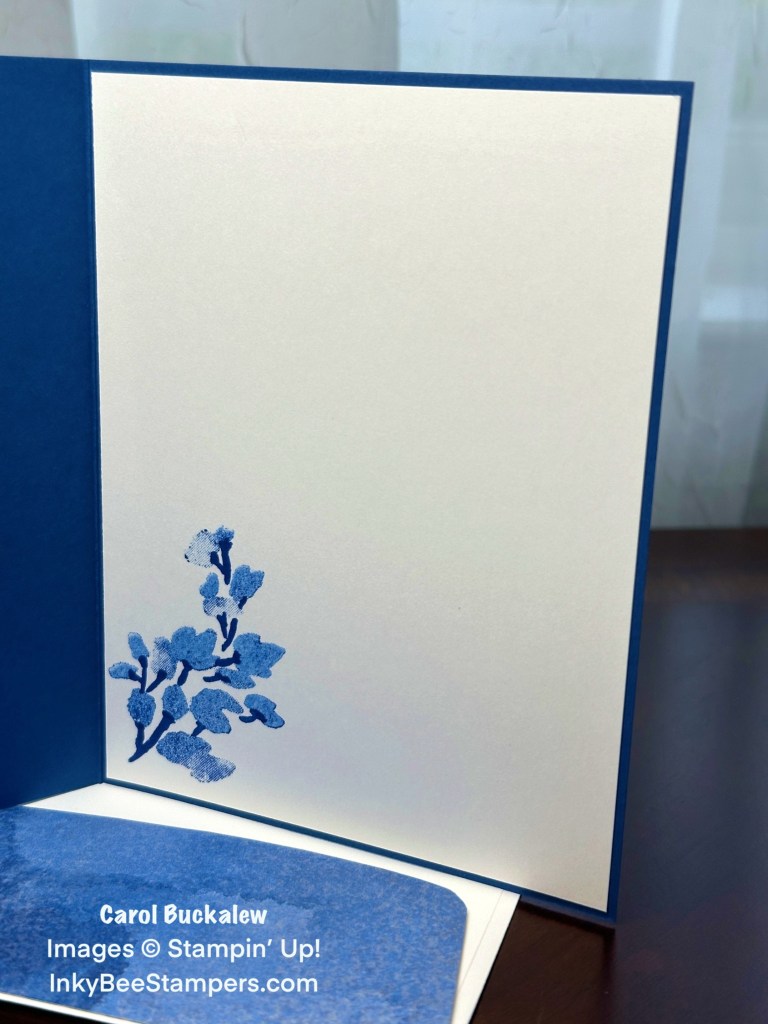
I used the two-step stamps from the Textured Floral Stamp Set to stamp the floral image onto the inside panel. The stem of the image was first generation stamped using Blueberry Bushel ink, and the flowers were second generation stamped. The panel was then adhered to the inside of the card.
The same floral image was stamped onto the envelope front and a coordinating piece of designer series paper was added to the envelope flap. To finish up the card I added three silver Adhesive-Backed Metallic Gems to the card front.
I so enjoyed trying out this technique! So much so that I will be sharing another Iris Paper Folding project with you tomorrow to show you how you can adapt this technique to any shape! So be sure to check back tomorrow. If you would like to recreate this card, you can download, save and print the pdf tutorial by clicking on the image below.
Back to School Sales Tax Holiday (US only)

The 2024 back-to-school sales tax holiday season begins this weekend and there are thirteen states and Puerto Rico offering a sales tax holiday for school supplies during the months of July and August. Products that are eligible according to the statute include “items normally used by students in a standard classroom for educational purposes.” To see the names of participating states, products exempted from tax, and sales tax holiday dates, click here.
Two New Kits Added to the Kits Collection!
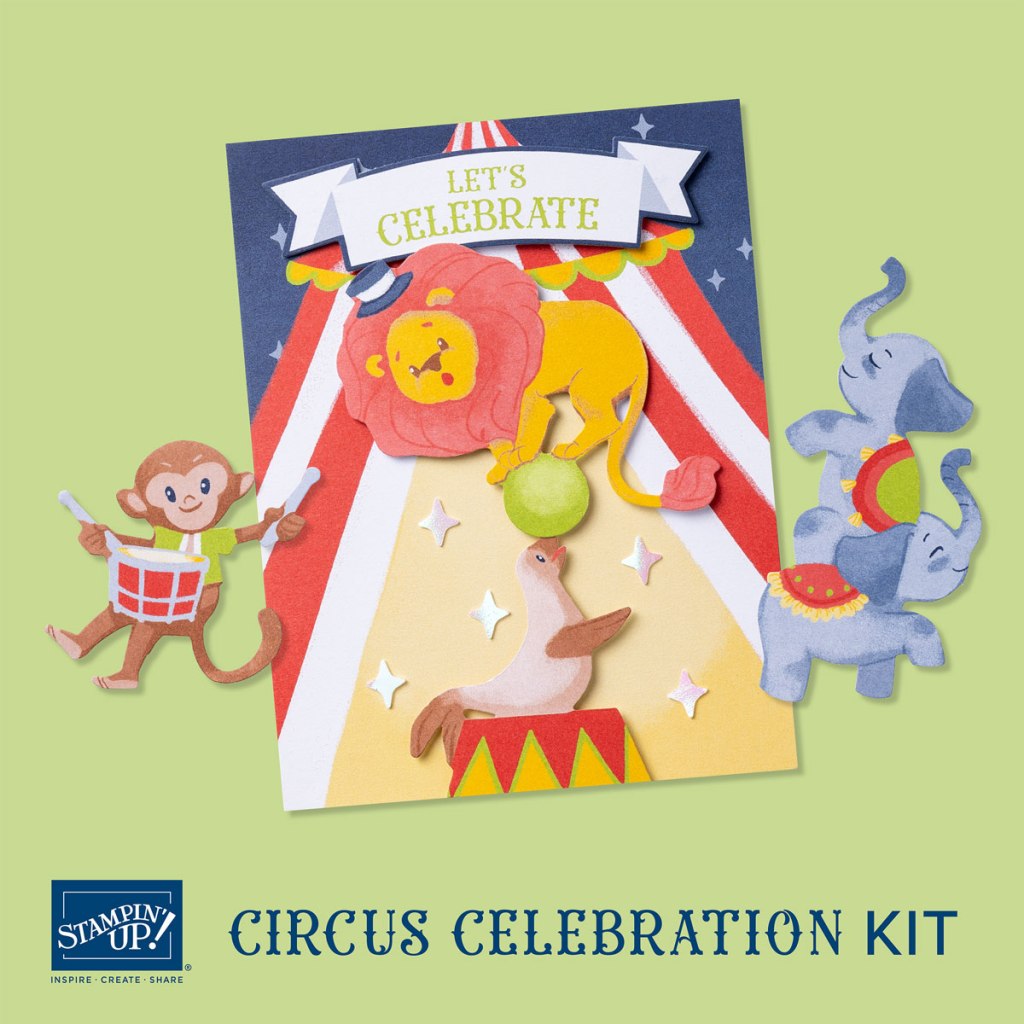
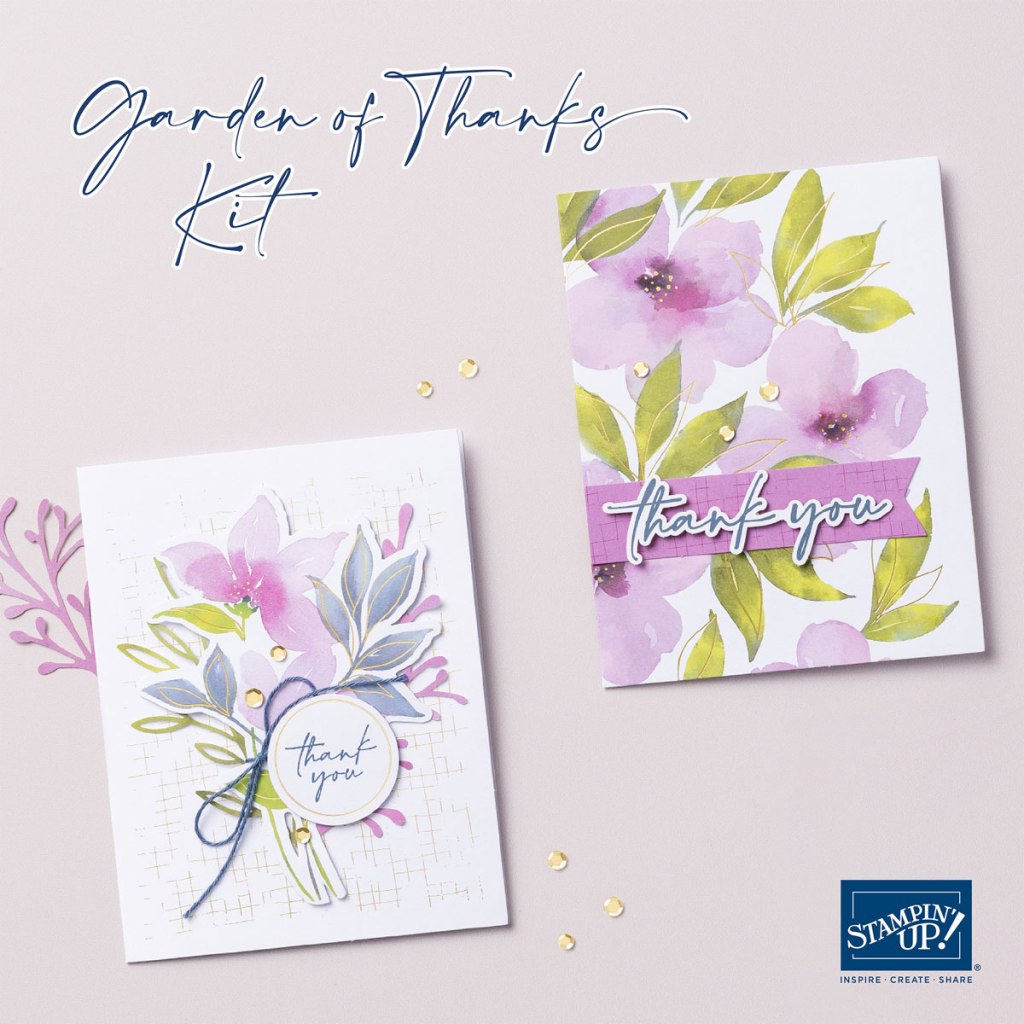
Each month, Stampin’ Up! adds new kits to the Kits Collection. Two new kits have been added to the collection for July – the Circus Celebration Kit and the Garden of Thanks Kit!
The Circus Celebration Kit creates a total of 8 cards – 4 each of 4 different designs. This kit is perfect for the little ones! Check out the unboxing video for the kit here:
The Garden of Thanks Kit is a lovely kit and creates a total of 9 cards – 3 each of 3 different designs. Need to send out thank you cards? This is the perfect kit! You can watch the unboxing video here:
If you are not familiar with the Kits Collection, kits come with everything you need to complete the project! And I mean everything! Easy to understand instructions are included with every kit also! Of course, Stampin’ Up! provides more than these two kits. Click here to view the full line of available kits in the Online Store. Happy crafting!
Bonus Days are Here!

It’s time for one of our favorite promotions—BONUS DAYS! Because do you know what’s a great deal? Getting rewarded for all the crafting supplies you’re already going to buy! When you shop between 3–31 July you will earn a $5 coupon for every $50 you spend! Make sure you save all your coupons because you can redeem them (and we mean ALL of them) between 1–31 August. There’s no limit to how many coupons you can earn!
Click here for an infographic explaining how Bonus Days works. You won’t want to miss earning coupons on your purchases in July!
New Online Exclusives Available Now!

There are a whole bunch of new Online Exclusives available for purchase in the Online Exclusives section of the Online Store now! I have been sharing some of these products with you on my blog over the last several weeks. I think you are going to enjoy these new products so be sure to check them out in the Online Exclusives section of the Online Store!
There are several new Suite Collections that are available including the Iconic Celebrations Suite Collection and the Season of Green & Gold Suite Collection (click on the Suite names to view the flyers). Plus, a Fall themed bundle and a Halloween bundle are also available. These are just some of the new products available for customer purchase beginning today in the Online Store!
Remember, there is no fixed end date for Online Exclusives! Some products will be reordered when inventory is low, and others will only be available while supplies last. This way Stampin’ Up! can offer even more new products throughout the year!
Ready to shop? Click here to go to the Online Exclusives!
July Host Code

Use my current Host Code and receive a free gift from me valued at $8 when you place an order of $35 or more (before shipping and tax). If you place an order greater than $150, do not use the Host Code as you will be eligible for Stampin’ Rewards (but you will still receive the free gift from me!). Use my July Host Code – 79GM6UNE.
Products used to create today’s project that are available for purchase are included below.


4 responses to “Stampin’ Up! Winter Meadow Thinking of You Card using the Iris Paper Folding Technique”
Such a pretty card Carol! Love the colors and the paper folding technique is awesome! 🙂
LikeLiked by 1 person
Thank you, Amy! This is such a fun technique! 🙂
LikeLike
So beautiful…..so impressive! I love the paper choices, the colors. Anyone would be thrilled to receive such a card….
LikeLiked by 1 person
Thank you, Faith! I’m loving the Iris Paper Folding technique, and it is not difficult! So happy I gave it a try! Have a great day! 🙂
LikeLike